Setting up a robust server environment is crucial for many applications, and learning how to install Ubuntu 24.04 Server is an excellent starting point. This long-term support (LTS) release, codenamed Noble Numbat, offers stability, security, and a wealth of features for developers and system administrators alike. Therefore, understanding the installation process ensures a solid foundation for your infrastructure. This comprehensive guide will walk you through every step, from preparation to post-installation tasks, making your journey to install Ubuntu 24.04 Server straightforward.
Introduction to Ubuntu 24.04 Server Installation
Ubuntu 24.04 lts Server represents the latest stable release from Canonical, designed for high performance and reliability in server environments. This version brings updated software packages, enhanced security features, and extended support for five years. Consequently, it is a preferred choice for deploying web servers, databases, and various cloud services. Our goal is to help you successfully install Ubuntu 24.04 Server on your hardware.
What is Ubuntu 24.04 LTS Server?
Ubuntu 24.04 LTS Server is a free, open-source operating system specifically optimized for server use cases. LTS stands for Long Term Support, meaning it receives critical updates and security patches for an extended period. This stability makes it ideal for production environments where reliability is paramount. Furthermore, it provides a command-line interface by default, offering minimal overhead and maximum control.
Why Choose Ubuntu Server for Your Infrastructure?
Choosing Ubuntu Server offers numerous advantages for any infrastructure project. It boasts a vast software repository, strong community support, and excellent documentation. Moreover, its robust security features and consistent updates ensure your server remains protected against vulnerabilities. Many organizations worldwide rely on Ubuntu Server for its flexibility and performance, making it a powerful platform for various workloads.
Pre-Installation Steps for Ubuntu 24.04 Server
Before you begin to install Ubuntu 24.04 Server, some crucial preparatory steps are necessary. These steps ensure a smooth installation process and prevent potential issues. Proper planning saves time and effort in the long run. Therefore, always review your system and data before proceeding.
System Requirements for Ubuntu 24.04 Server
Your hardware must meet specific minimum requirements to run Ubuntu 24.04 Server effectively. These specifications ensure optimal performance and stability. While minimal, exceeding these recommendations will provide a better experience. Consider your planned server roles when assessing your hardware.
- CPU: 2 GHz dual-core processor (64-bit)
- RAM: 4 GB system memory
- Disk Space: 25 GB of free hard-drive space
- Internet Access: Recommended for updates during installation
Downloading the Official Ubuntu 24.04 Server ISO
The first step involves obtaining the official installation image. You must download the Ubuntu 24.04 Server ISO file from the official Ubuntu website. Always download from reputable sources to ensure authenticity and security. After downloading, verify the ISO’s integrity using its SHA256 checksum to prevent corrupted installations. You can find the official downloads here: Ubuntu Server Download.
Essential Data Backup Considerations
Installing a new operating system often involves formatting disk drives. Therefore, backing up all critical data from the target system is absolutely essential. This precaution prevents irreversible data loss. Use an external drive or cloud storage for your backups. Furthermore, double-check your backups before proceeding with the installation to ensure all vital information is secure.
Creating Your Ubuntu 24.04 Server Bootable Media
Once you have the ISO file, you need to create bootable media. This media will allow your server to start the installation process. A USB drive is the most common and convenient option today. However, you can also use a DVD if your server supports it. The method for creating bootable media varies slightly depending on your operating system.
Using Etcher to Prepare a Bootable USB Drive
Balena Etcher is a popular, cross-platform tool for creating bootable USB drives. It offers a simple, user-friendly interface suitable for all skill levels. Just select your ISO, choose your USB drive, and Etcher handles the rest. This method is highly recommended for its ease of use and reliability when you install Ubuntu 24.04 Server.
Rufus for Windows Users: Making a Bootable USB
Windows users often prefer Rufus for creating bootable USB drives. Rufus is a fast and powerful utility that provides various options for customization. Simply select your Ubuntu 24.04 Server ISO, choose your USB device, and click start. It efficiently prepares your USB drive for booting the installer.
`dd` Command for Linux/macOS: Creating Bootable Media
Linux and macOS users can utilize the built-in `dd` command for creating bootable media. This command offers precise control but requires careful execution to avoid data loss on incorrect drives. Replace `/dev/sdX` with your USB device identifier. For example, `sudo dd if=/path/to/ubuntu-24.04-live-server-amd64.iso of=/dev/sdX bs=4M status=progress` is a common command. Always double-check your target device before running `dd`.
The Step-by-Step Ubuntu 24.04 Server Installation Guide
Now, we move to the core process: the actual installation of Ubuntu 24.04 Server. Follow these steps carefully to ensure a successful setup. Each stage is important for configuring your server correctly. This comprehensive guide ensures you cover all the necessary ground.
Booting from the Installation Media
Insert your bootable USB drive into the server and power it on. You may need to access your system’s BIOS/UEFI settings to change the boot order. Typically, pressing keys like F2, F10, F12, or Del during startup accesses these settings. Select your USB drive as the primary boot device. This action will launch the Ubuntu installer.
Initial Language and Keyboard Selection
The installer will first prompt you to choose your preferred language. Select the language that suits you best. Furthermore, you will configure your keyboard layout. Ensure these settings are correct for smooth interaction with your new server. This step is crucial for accurate input during and after installation.
Network Configuration and Proxy Settings
Next, the installer guides you through network setup. You can configure a dynamic IP address (DHCP) or a static IP address, depending on your network environment. If your network uses a proxy server, you can also specify those details here. Proper network configuration is vital for accessing updates and services.
Disk Partitioning Options for Ubuntu 24.04 Server
This is a critical stage where you define how Ubuntu 24.04 Server will use your disk space. The installer offers guided partitioning options, which are suitable for most users. Alternatively, you can choose manual partitioning for custom layouts, such as separate partitions for `/boot`, `/`, `/home`, and `/var`. Carefully review your choices before proceeding to avoid data loss.
Creating Your User Account and Enabling SSH
You will create your primary user account, including a username and a strong password. This account will have administrative privileges. Additionally, the installer provides an option to install and enable the OpenSSH server. Enabling SSH is highly recommended for remote access to your server after installation. This feature is essential for headless server management.
Selecting Optional Server Snaps and Completing Setup
The installer presents a selection of popular server snaps (applications) you can install immediately. These include services like `nextcloud` or `docker`. Choose any relevant snaps for your server’s intended purpose. Finally, the installation process will complete, and you will be prompted to restart your system. Remove the USB drive before rebooting.
- Boot from your created USB media.
- Select your preferred language and keyboard layout.
- Configure network settings (DHCP or static IP).
- Choose disk partitioning (guided or manual).
- Create your user account and enable SSH.
- Select optional server snaps and finalize the installation.
Post-Installation Configuration for Your Ubuntu 24.04 Server
After successfully completing the installation, several post-installation steps are recommended. These steps enhance security, performance, and functionality. Therefore, they are crucial for a well-maintained server. Regularly performing these tasks keeps your system healthy.
Updating and Upgrading Your System
The first action after logging into your new server should be to update and upgrade all installed packages. Open a terminal and run `sudo apt update && sudo apt upgrade -y`. This ensures your system has the latest security patches and software versions. Regular updates are fundamental for maintaining server security and stability.
Installing Common Server Software and Services
Depending on your server’s role, you will install various software packages. For example, you might install a web server like Apache or Nginx, a database like MySQL or PostgreSQL, or other services. Use the `apt install` command for these installations. Consider your specific needs and install only necessary software to minimize the attack surface.
- Apache Web Server: `sudo apt install apache2`
- Nginx Web Server: `sudo apt install nginx`
- MySQL Database: `sudo apt install mysql-server`
- PHP for web applications: `sudo apt install php libapache2-mod-php`
Basic-security-hardening-for-ubuntu-24-04-server">Basic Security Hardening for Ubuntu 24.04 Server
Implementing basic security measures is vital for protecting your server. Configure a firewall using UFW (Uncomplicated Firewall) to restrict incoming connections. Furthermore, consider setting up SSH key-based authentication instead of passwords for enhanced remote access security. Regularly review system logs and implement intrusion detection systems for proactive monitoring.
Troubleshooting Ubuntu 24.04 Server Installation Issues
Sometimes, you might encounter issues when you install Ubuntu 24.04 Server. Knowing how to troubleshoot common problems can save significant time and frustration. Therefore, understanding potential pitfalls is part of the learning process. Here are a few common challenges and their solutions.
Resolving Boot Loader (GRUB) Problems
GRUB (Grand Unified Bootloader) issues can prevent your server from booting. This often happens due to incorrect disk partitioning or dual-boot setups. You can usually fix GRUB problems by booting into a live Ubuntu environment and using the `boot-repair` utility. Alternatively, manually reinstalling GRUB from the live environment can resolve the issue.
Addressing Network Connectivity Failures
If your server lacks network connectivity after installation, first check physical connections like Ethernet cables. Then, verify your `netplan` configuration files in `/etc/netplan/` for correct IP addresses, gateways, and DNS settings. Restart the `systemd-networkd` service or reboot the server after making changes. Incorrect network settings are a frequent cause of connectivity problems.
Dealing with Disk Partitioning Errors
Disk partitioning errors can arise from selecting the wrong drive, insufficient space, or incompatible partition tables. If you encounter such errors, reboot the installer and re-examine your disk selection carefully. Consider using the “Erase disk and install Ubuntu” option for simplicity on dedicated server hardware. Always double-check your choices before committing to changes.
Frequently Asked Questions
Many users have common questions when they install Ubuntu 24.04 Server. This section addresses some of the most frequent inquiries. Understanding these answers will further enhance your server management capabilities. We aim to provide clear and concise responses.
Can I install Ubuntu 24.04 Server on a Raspberry Pi?
Yes, Ubuntu 24.04 Server offers specific images tailored for Raspberry Pi devices. This allows you to leverage the power of Ubuntu on these compact, energy-efficient single-board computers. The installation process is similar but uses a specialized image.
What is the default username and password after installation?
There is no default username or password. You create your primary user account and password during the installation process. This user has `sudo` privileges, allowing administrative tasks. Always use a strong, unique password for your account.
How do I access my Ubuntu 24.04 Server remotely?
You can access your Ubuntu 24.04 Server remotely using SSH (Secure Shell). Use an SSH client (like PuTTY on Windows or `ssh` command on Linux/macOS) with your server’s IP address and your username. For example, `ssh username@server_ip_address`. Ensure SSH was enabled during installation.
Is it possible to perform an unattended installation?
Yes, Ubuntu Server supports unattended installations using a feature called “Autoinstall” with a `cloud-init` configuration file. This allows for automated deployments, which is highly beneficial for large-scale server rollouts. It requires pre-configuring an answer file.
What are the benefits of using an LTS release like 24.04?
LTS (Long Term Support) releases provide extended maintenance, including security updates and bug fixes, for five years. This stability is crucial for production environments, reducing the need for frequent upgrades. Consequently, it offers predictability and lower operational costs compared to non-LTS releases.
Conclusion: Your New Ubuntu 24.04 Server Awaits
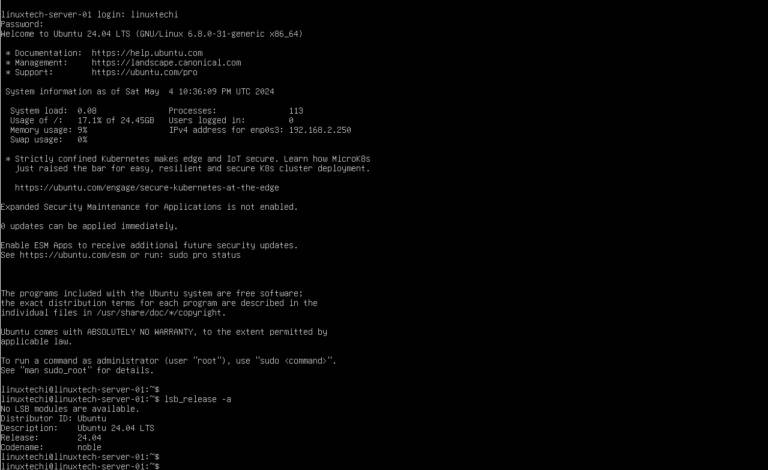
You have now successfully learned how to install Ubuntu 24.04 Server, navigating through preparation, installation, and initial configuration. This robust operating system provides a powerful foundation for countless server applications. Your journey into server administration has just begun, with a stable and secure system at your command. The steps outlined here provide a clear path to a functional server.
Summary of Your Ubuntu 24.04 Server Setup Journey
We covered everything from understanding system requirements and downloading the ISO to creating bootable media and executing the step-by-step installation. Furthermore, we explored crucial post-installation tasks like updating your system and implementing basic security measures. You now possess a fully functional Ubuntu 24.04 Server, ready for deployment. This comprehensive guide has equipped you with the knowledge to manage your server effectively.
Next Steps and Exploring Ubuntu Server Capabilities
With your Ubuntu 24.04 Server installed, the possibilities are vast. Consider exploring services like web hosting, database management, containerization with Docker, or setting up a personal cloud. The Ubuntu community and extensive documentation offer abundant resources for further learning. Continue to experiment and expand your server’s capabilities.
Call to Action: Dive Deeper into Ubuntu 24.04 Server Management
Now that you know how to install Ubuntu 24.04 Server, take the next step. Start deploying your applications, experiment with different server roles, and delve into advanced configurations. Share your experiences and questions in the comments below. We encourage you to explore the full potential of your new Ubuntu server!
2 thoughts on “How To Install Ubuntu 24.04 Server: A Complete Guide”