
Managing Docker containers can become complex, especially when dealing with multiple applications and services. Fortunately, tools like Portainer simplify this process significantly. This comprehensive guide will show you how to install Portainer Docker Compose, providing a robust and efficient way to deploy and manage your containerized environments. By leveraging Docker Compose, you can define your Portainer setup in a simple YAML file, ensuring consistency and ease of deployment. Therefore, understanding this installation method is crucial for any Docker enthusiast or professional seeking streamlined container orchestration.
Understanding Portainer and How to Install Portainer Docker Compose
Portainer is an open-source management UI for Docker, Kubernetes, and Swarm environments. It provides a user-friendly interface to manage containers, images, networks, and volumes. This powerful tool significantly reduces the complexity of interacting with the Docker CLI, making container management accessible to a wider audience. Furthermore, Portainer offers robust features for monitoring, security, and application deployment.
What is Portainer and Why Use It?
Portainer Community Edition (CE) is a lightweight service that runs as a Docker container itself. It allows you to visualize and manage your Docker resources directly from a web browser. Using Portainer saves time and reduces the potential for errors. It simplifies tasks like deploying new applications, inspecting logs, and managing user access. Consequently, it’s an indispensable tool for efficient Docker operations.
- Simplified Management: Intuitive web UI for Docker.
- Resource Monitoring: Track container performance and status.
- Enhanced Security: Role-based access control for teams.
- Application Deployment: Easily deploy applications from templates or Docker Compose files.
Benefits of Using Docker Compose for Portainer Installation
Docker Compose is a tool for defining and running multi-container Docker applications. It uses a YAML file to configure application services, making deployment repeatable and straightforward. When you install Portainer Docker Compose, you gain several advantages. This method ensures that Portainer is set up consistently every time. Moreover, it simplifies updates and future management of the Portainer instance.
Using Docker Compose for Portainer offers a declarative approach to infrastructure. You define the desired state of your Portainer deployment in a single file. This approach is excellent for version control and team collaboration. Additionally, it makes migrating your Portainer setup to a new host much easier. Therefore, Docker Compose is the preferred method for many administrators.
Prerequisites for Portainer Docker Compose Installation
Before you can successfully install Portainer Docker Compose, certain prerequisites must be met. Ensuring your system is properly configured will prevent common installation issues. These steps are fundamental for a smooth deployment process. Consequently, taking the time to verify these items is highly recommended.
Ensuring Docker Engine and Docker Compose are Installed
First, you need a working Docker Engine installation on your host machine. This includes the Docker daemon and the Docker CLI. Additionally, Docker Compose must also be installed. Modern Docker Desktop installations typically include Docker Compose V2 by default, accessible via `docker compose` (note the space). Older setups might require a separate installation of Docker Compose V1, which uses `docker-compose` (with a hyphen). Verify your installations by running the following commands:
docker --version
docker compose version
If these commands do not return version numbers, you must install Docker and Docker Compose first. You can find official installation guides on the Docker website . This step is non-negotiable for proceeding with the Portainer setup.
System Requirements and Recommended Setup
Portainer itself is lightweight, but your Docker host needs sufficient resources to run it alongside other containers. A Linux distribution like Ubuntu or Debian is commonly used, but Portainer also runs on Windows and macOS with Docker Desktop. Ensure your system has at least 1GB of RAM and a dual-core processor. Furthermore, allocate enough disk space for Portainer’s persistent data and any applications you plan to manage. A stable internet connection is also vital for downloading images.
Creating a Dedicated Directory for Portainer Data
It is best practice to create a dedicated directory for Portainer’s persistent data. This ensures that Portainer’s configuration and database are stored safely and can be backed up easily. For example, you might create a directory named `portainer` in your home folder or `/opt`. Navigate to your chosen location and create the directory. This directory will later be mounted as a volume into the Portainer container. This step is crucial for data persistence.
Crafting Your Portainer Docker Compose File (docker-compose.yml)
The core of your Portainer deployment using Docker Compose is the `docker-compose.yml` file. This YAML file defines the services, networks, and volumes required for Portainer to run. Creating this file correctly is essential for a successful installation. Therefore, pay close attention to the details provided in this section. This file acts as a blueprint for your Portainer environment.
Basic-portainer-service-definition">Understanding the Basic Portainer Service Definition
The `docker-compose.yml` file specifies the Portainer service. It defines the image to use, the container name, and restart policies. Here is a basic example of the service definition:
version: '3.9'
services:
  portainer:
    container_name: portainer
    image: portainer/portainer-ce:latest
    restart: always
This snippet tells Docker Compose to pull the latest Portainer Community Edition image. It also ensures the container restarts automatically if it stops. The `container_name` makes it easy to identify the Portainer instance. This is the foundation of your Portainer setup.
Mounting Volumes for Persistent Data (portainer_data)
For Portainer to retain its configuration and data across container restarts, you must mount a persistent volume. This is where the dedicated directory you created earlier comes into play. You will define a named volume and link it to the container’s internal data path (`/data`). This is a critical step to ensure your Portainer settings are not lost.
- Define the volume: Add a `volumes` section at the top level of your `docker-compose.yml`.
- Mount the volume: Under the `portainer` service, specify the volume mount.
Here’s how to integrate the volume into your `docker-compose.yml`:
version: '3.9'
services:
  portainer:
    container_name: portainer
    image: portainer/portainer-ce:latest
    restart: always
    volumes:
      - /var/run/docker.sock:/var/run/docker.sock
      - portainer_data:/data
volumes:
  portainer_data:
The `/var/run/docker.sock` mount allows Portainer to communicate with the Docker daemon. The `portainer_data` volume ensures persistent storage. This setup is standard for Portainer deployments.
Exposing Portainer Ports (9000, 9443) for Access
To access the Portainer web interface, you need to expose its ports to your host machine. Portainer typically uses port 9443 for HTTPS and port 9000 for HTTP (if SSL is not configured or for older versions). It’s highly recommended to use HTTPS for secure access. Add a `ports` section to your Portainer service definition. This allows you to connect to the UI from your browser.
Here’s the updated `docker-compose.yml` snippet with port mappings:
version: '3.9'
services:
  portainer:
    container_name: portainer
    image: portainer/portainer-ce:latest
    restart: always
    ports:
      - "8000:8000" # For agent communications (optional, if you use edge agents)
      - "9443:9443" # For HTTPS UI access
    volumes:
      - /var/run/docker.sock:/var/run/docker.sock
      - portainer_data:/data
volumes:
  portainer_data:
The `8000:8000` port is for the Portainer Edge Agent, which is optional for a single-node setup. The `9443:9443` mapping ensures you can reach the Portainer UI via `https://your-server-ip:9443`. This completes the `docker-compose.yml` file for a basic Portainer installation. Make sure to save this file as `docker-compose.yml` in your chosen directory.
Executing the Portainer Docker Compose Deployment
With your `docker-compose.yml` file ready, the next step is to execute the deployment. This involves using the Docker Compose CLI to bring up the Portainer service. The process is straightforward and typically completes within a few moments. Therefore, you will quickly see your Portainer instance running.
Navigating to Your docker-compose File Directory
Open your terminal or command prompt. Navigate to the directory where you saved your `docker-compose.yml` file. For instance, if you saved it in `/opt/portainer`, you would use `cd /opt/portainer`. This ensures that Docker Compose can find the correct configuration file. Running the command from the wrong directory will result in an error. Always double-check your current working directory.
Running `docker compose up -d` to Install Portainer
Once in the correct directory, execute the following command: `docker compose up -d`. The `-d` flag runs the containers in detached mode, meaning they will run in the background. Docker Compose will then download the Portainer image (if not already present) and create the container, network, and volume as defined in your YAML file. This command effectively initiates the install Portainer Docker Compose process. You will see output indicating the creation of services and networks.
Verifying Portainer Container Status and Health
After running the `up` command, verify that the Portainer container is running correctly. Use the command `docker ps` to list all running containers. You should see an entry for `portainer` with a status of “Up”. Additionally, you can check the logs for the Portainer container using `docker logs portainer`. This helps confirm that Portainer started without any errors. A healthy status indicates a successful deployment.
Accessing and Initializing the Portainer UI
Once the Portainer container is up and running, the final step is to access its web interface and complete the initial setup. This involves creating an administrator account and connecting Portainer to your local Docker environment. The UI is intuitive, guiding you through these initial configurations. Therefore, you will be managing your Docker setup in no time.
First-Time Login and Admin User Creation
Open your web browser and navigate to `https://your-server-ip:9443` (replace `your-server-ip` with the IP address or hostname of your Docker host). You might encounter a security warning due to a self-signed certificate, which you can safely bypass for a local setup. The first screen will prompt you to create an administrator user. Choose a strong username and password. This account will have full control over your Portainer instance. Remember these credentials carefully.
Connecting Portainer to Your Local Docker Environment
After creating your admin user, Portainer will ask you to choose an environment to manage. Select “Local” to connect to the Docker environment on the host where Portainer is running. Click “Connect.” Portainer will then establish a connection to your Docker daemon. This step is crucial for Portainer to discover and manage your existing containers, images, and other Docker resources. You are now ready to explore the dashboard.
Exploring the Portainer Dashboard and Features
Upon successful connection, you will be redirected to the Portainer dashboard. Here, you can see an overview of your Docker environment, including running containers, images, and volumes. Take some time to explore the various sections: “Containers,” “Images,” “Networks,” “Volumes,” and “Stacks.” Portainer provides comprehensive tools for managing every aspect of your Docker setup. This powerful interface makes Docker management far more efficient.
Managing Portainer and Docker Stacks with Docker Compose
Using Docker Compose for Portainer installation also simplifies its ongoing management. You can easily update Portainer, stop it, or remove it using simple Docker Compose commands. This consistency is a major benefit of the Docker Compose approach. Additionally, you can integrate other Docker Compose applications seamlessly.
Updating Portainer Using Docker Compose Commands
To update Portainer to a newer version, navigate to your `docker-compose.yml` directory. First, pull the latest image: `docker compose pull portainer`. Then, recreate the container using the new image: `docker compose up -d`. Docker Compose will detect the image change and update your Portainer instance while preserving your data. This is a clean and efficient way to keep Portainer current.
Stopping and Removing Portainer Deployment
If you need to stop Portainer, use `docker compose stop`. This will stop the container but keep its data and configuration. To completely remove Portainer and its associated network and volume (including data), use `docker compose down -v`. The `-v` flag ensures the volume (and thus your data) is also removed. Be cautious with `docker compose down -v` as it is destructive to your Portainer data. Only use it when you intend to completely uninstall Portainer.
Integrating Other Docker Compose Applications
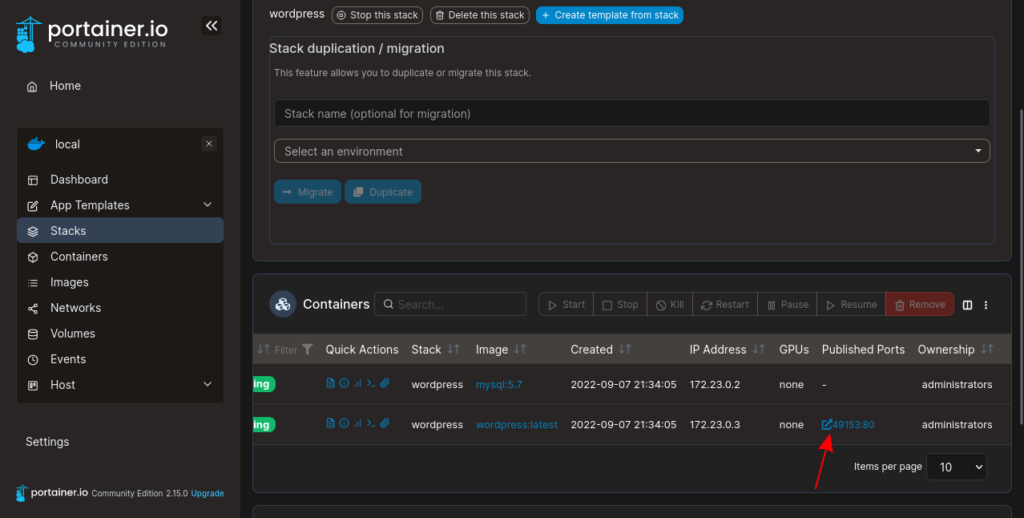
Portainer excels at managing Docker Compose applications, often called “stacks.” You can deploy new stacks directly through the Portainer UI by providing a `docker-compose.yml` file. This allows you to manage multiple multi-container applications from a single interface. Simply navigate to “Stacks” in the Portainer sidebar, click “Add stack,” and paste your Compose file. Portainer makes it incredibly easy to deploy and monitor complex applications.
Troubleshooting Common Portainer Docker Compose Installation Issues
Even with careful planning, you might encounter issues when you install Portainer Docker Compose. Knowing how to diagnose and resolve these common problems can save you considerable time. This section covers some of the most frequent hurdles. Therefore, understanding these solutions is vital for a smooth experience.
Resolving Port Conflicts and Access Errors
A common issue is a port conflict, where another service on your host is already using port 9443 or 8000. Check for conflicting processes using `sudo lsof -i :9443` (on Linux). If a conflict exists, you can change the host port mapping in your `docker-compose.yml` (e.g., `9444:9443`). Additionally, ensure your firewall allows traffic on the chosen Portainer ports. Incorrect firewall rules can prevent UI access.
Diagnosing Volume Mounting Failures
If Portainer fails to start or loses data, it might be due to incorrect volume mounting. Double-check that the `portainer_data` volume is correctly defined and mounted in your `docker-compose.yml`. Ensure the host directory for the volume exists and has the correct permissions. Docker needs read/write access to this directory. Incorrect paths or permissions are frequent culprits for volume-related problems. Use `docker volume ls` to verify the volume creation.
Checking Docker Logs for Portainer Startup Problems
When Portainer doesn’t start as expected, the first place to look is the container logs. Use `docker logs portainer` to view output from the Portainer container. Error messages here can provide crucial clues about what went wrong. For example, you might see messages about database corruption or configuration issues. These logs are your best friend for debugging. They provide detailed insights into container behavior.
Frequently Asked Questions
What is the difference between Portainer CE and Business Edition?
Portainer Community Edition (CE) is free and open-source, offering robust features for managing Docker environments. The Business Edition (BE) includes additional enterprise-grade features like advanced authentication, GitOps capabilities, and enhanced support. For most individual users and small teams, Portainer CE is more than sufficient. However, larger organizations might benefit from the advanced features of BE.
Can I install Portainer without Docker Compose?
Yes, you can install Portainer directly using a single `docker run` command. However, using Docker Compose is generally recommended for its declarative nature and ease of management. The `docker run` command can become quite long and complex, making it harder to maintain and update. Docker Compose provides a more structured and reproducible deployment. Therefore, it is the preferred method for many.
How do I backup Portainer data when installed via Docker Compose?
Since you used a named volume (`portainer_data`), backing up Portainer data is straightforward. You can create a temporary container to copy data from the volume: `docker run –rm –volumes-from portainer_data -v $(pwd):/backup ubuntu tar cvf /backup/portainer_backup.tar /data`. This command creates a tar archive of your Portainer data in your current directory. This method ensures all your configurations and settings are safely stored. Regularly backing up your data is a good practice.
Conclusion: Simplify Your Docker Journey with Portainer and Docker Compose
Successfully learning how to install Portainer Docker Compose is a significant step towards efficient Docker container management. You’ve learned how to define your Portainer setup in a `docker-compose.yml` file, deploy it, and perform initial configurations. Portainer, coupled with Docker Compose, provides a powerful and user-friendly solution for orchestrating your containerized applications. This combination streamlines workflows and enhances productivity.
By leveraging Portainer’s intuitive UI and Docker Compose’s declarative power, you can manage your Docker environments with unprecedented ease. We encourage you to explore Portainer’s advanced features, such as stack management, user access control, and environment monitoring. Start managing your containers efficiently today. Share your experiences in the comments below or explore more advanced Portainer configurations on our blog!