
Managing multiple terminal sessions efficiently is a common challenge for Linux users and system administrators. Understanding how to use Linux Screen can dramatically enhance your productivity, allowing you to keep processes running in the background and switch between tasks seamlessly. This comprehensive guide will walk you through the essential commands and advanced features of GNU Screen, empowering you to master your command-line environment. We will explore its core functionalities, from Basic session management to advanced customizations, ensuring you get the most out of this powerful utility.
Introduction to Linux Screen: Master Your Terminal
Linux Screen, often referred to as GNU Screen, is a robust terminal multiplexer. It allows users to manage multiple independent terminal sessions within a single SSH connection or console. This utility is particularly invaluable for remote server management, where maintaining persistent processes is crucial. Therefore, learning how to use Linux Screen is a fundamental skill for anyone working extensively with the command line.
What is GNU Screen and Why It’s Essential
GNU Screen acts as a wrapper around your shell, providing a virtual terminal that persists even if your network connection drops. It creates a layer between your SSH client and the processes running on the server. This means you can start a long-running script, detach from the session, and reattach later from a different location without interrupting the process. Furthermore, it allows you to organize your work into multiple windows, each running a separate command or application.
Key Benefits of Using Linux Screen for Terminal Management
The advantages of integrating Linux Screen into your workflow are numerous. It offers unparalleled flexibility and resilience for command-line operations. Consider these primary benefits:
- Session Persistence: Keep applications running even after disconnecting from SSH.
- Multiple Windows: Organize various tasks within a single terminal session.
- Session Sharing: Collaborate with others by sharing your active Screen session.
- Scrollback Buffer: Review past output, even if it scrolled off the screen.
- Security: Detach from a server without leaving processes exposed.
Getting Started: Installing and Launching Linux Screen
Before you can harness the power of this utility, you need to ensure it’s installed on your system. The installation process is straightforward on most Linux distributions. Subsequently, launching your first session is equally simple, paving the way for more complex operations. This section will guide you through these initial steps to effectively use Linux Screen.
How to Install Linux Screen on Popular Distributions
Installing GNU Screen is typically done through your distribution’s package manager. The process is quick and generally requires administrative privileges. Here are common commands for various Linux systems:
- Debian/Ubuntu:
sudo apt update && sudo apt install screen - CentOS/RHEL/Fedora:
sudo yum install screenorsudo dnf install screen - Arch Linux:
sudo pacman -S screen
Once the installation completes, you’re ready to start your first session. This ensures you have the necessary tools to begin learning how to use Linux Screen effectively.

Starting Your First Linux Screen Session
Launching a Screen session is incredibly simple. Just type screen in your terminal and press Enter. You’ll see a brief introductory message; press Enter again to dismiss it. You are now inside a new Screen session. Any commands you run will execute within this persistent environment. To confirm you are in a Screen session, you can use the command echo $TERM, which should output “screen”.
Mastering Basic Linux Screen Commands and Navigation
The true power of GNU Screen lies in its command structure. These commands, often initiated with a prefix key (Ctrl+a by default), allow you to manipulate sessions, windows, and views. Understanding these fundamental operations is key to truly grasp how to use Linux Screen for daily tasks. We will cover the most common and essential commands here.
Detaching and Reattaching Linux Screen Sessions
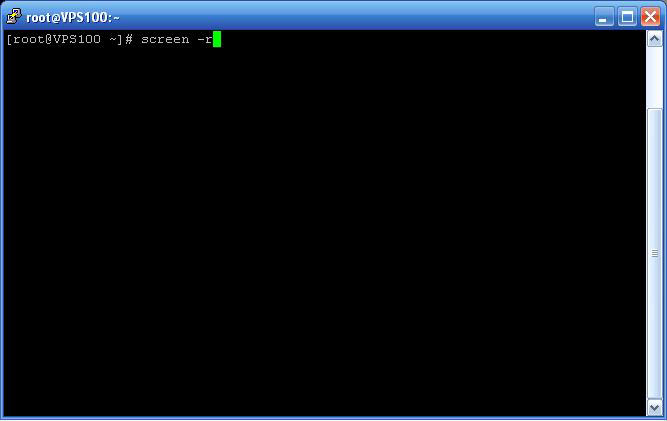
One of the most crucial features is the ability to detach from a session and reattach later. This is particularly useful when working over SSH. To detach from your current session, press Ctrl+a d. Your terminal will return to its original state, and the Screen session will continue running in the background. To reattach, use screen -r. If you have multiple detached sessions, you might need to specify the session ID, which you can find using screen -ls.
Creating and Navigating Multiple Windows within Screen
Linux Screen allows you to create multiple virtual windows within a single session, each running a different command. This helps organize your workflow significantly. Here’s how to manage them:
- Create a new window: Press Ctrl+a c.
- Switch to the next window: Press Ctrl+a n.
- Switch to the previous window: Press Ctrl+a p.
- List all windows: Press Ctrl+a “ (double quote).
- Switch to a specific window by number: Press Ctrl+a [number] (e.g., Ctrl+a 0).
These commands make navigating complex workflows straightforward. Therefore, learning how to use Linux Screen for window management is a major productivity booster.
Splitting Your Terminal with Linux Screen
Screen can also split your terminal into multiple regions, displaying different windows simultaneously. This is incredibly useful for monitoring logs in one pane while working in another. Here are the commands:
- Split horizontally: Press Ctrl+a S (capital S).
- Split vertically: Press Ctrl+a | (pipe symbol).
- Switch focus to the next region: Press Ctrl+a Tab.
- Close the current region: Press Ctrl+a X.
- Close all regions but the current one: Press Ctrl+a Q.
These splitting capabilities demonstrate another powerful way to use Linux Screen, especially for complex tasks requiring multiple concurrent views.
Advanced Usage: Enhancing Productivity with Linux Screen
Beyond the basics, GNU Screen offers a wealth of advanced features that can further streamline your terminal experience. Customization, logging, and collaboration tools elevate its utility. Mastering these aspects will truly unlock the full potential of how to use Linux Screen in professional environments.
Customizing Your Screen Configuration (.screenrc file)
You can personalize your Screen environment by creating a .screenrc file in your home directory. This file allows you to set default options, key bindings, and startup commands. For instance, you can change the default prefix key or set a custom status line. A common customization is to add hardstatus alwayslastline "%{= kg} %H %{g}%?%25l%{=b kr}%? %t %c %D %d/%m %Y" to display system information. This level of control makes Linux Screen highly adaptable to individual preferences.
Logging Screen Output for Review and Debugging
Sometimes, you need to capture the output of a command for later review or debugging. Linux Screen provides a built-in logging feature for this purpose. To start logging the current window’s output to a file, press Ctrl+a H. The log file is usually named screenlog.0 (or similar) in your home directory. Press Ctrl+a H again to stop logging. This is an invaluable tool for troubleshooting or keeping records of server interactions, demonstrating another practical way to use Linux Screen.
Sharing Linux Screen Sessions with Collaborators
Collaboration is made easy with Screen’s multi-user mode. You can allow other users on the same system to attach to your active session. First, start Screen with screen -S my_session -m. Then, enable multi-user mode within the session by pressing Ctrl+a :multiuser on. Finally, add the user with Ctrl+a :acladd username. The collaborator can then attach using screen -x username/my_session. This feature significantly enhances team productivity, showcasing a powerful aspect of how to use Linux Screen.
Troubleshooting and Best Practices for Linux Screen
Even with its robustness, you might encounter minor issues or seek ways to optimize your workflow. This section addresses common problems and offers tips to ensure a smooth experience. Adhering to best practices will help you maximize the benefits of how to use Linux Screen effectively.
Common Linux Screen Issues and How to Resolve Them
Occasionally, a Screen session might become unresponsive or orphaned. If you can’t reattach, try listing sessions with screen -ls. If a session is marked “Attached” but you’re not connected, you might need to “detach” it forcefully using screen -D -r [session_id]. If a session is truly stuck, you might have to kill it with screen -X -S [session_id] quit. Understanding these commands helps maintain a clean and functional environment.
Tips for an Efficient Linux Screen Workflow
To truly master how to use Linux Screen, consider these best practices. Always name your sessions using screen -S session_name for easier identification. Use meaningful window titles (Ctrl+a A) to quickly distinguish between tasks. Regularly review your .screenrc file to keep your customizations up-to-date. Finally, remember that Screen is just one tool; combine it with other utilities like SSH keys and shell aliases for an even more powerful setup.
Frequently Asked Questions About Linux Screen
What’s the main difference between Screen and Tmux?
Both Screen and Tmux are terminal multiplexers offering similar functionalities like session persistence and window management. However, Tmux is generally considered more modern, with a more intuitive configuration syntax and better support for scripting. Screen is older and widely available, often pre-installed on systems. While both are excellent, many users find Tmux’s default keybindings and splitting features more user-friendly. For a deeper dive into their differences, you can refer to resources like the GNU Screen Wikipedia page.
How do I kill a specific Linux Screen session?
To kill a specific Screen session, first list all active sessions using screen -ls to find its session ID. Once you have the ID (e.g., 12345.pts-0.hostname), you can terminate it with the command screen -X -S 12345 quit. This command sends a ‘quit’ signal to the specified session, closing all its windows and processes gracefully.
Can I use Linux Screen over an SSH connection?
Yes, absolutely. Using Linux Screen over an SSH connection is one of its primary and most powerful use cases. You simply SSH into your remote server, then type screen to start a new session. If your SSH connection drops, your Screen session and all its running processes will continue uninterrupted on the server. You can then re-establish your SSH connection and reattach to your Screen session using screen -r.
Conclusion: Unleash Your Terminal Productivity with Linux Screen
Mastering how to use Linux Screen is a transformative skill for anyone who spends significant time in the terminal. From ensuring long-running processes survive network disconnections to organizing complex workflows with multiple windows and splits, Screen offers unparalleled control and efficiency. By understanding its basic commands and exploring its advanced features, you can significantly enhance your productivity and streamline your command-line experience. Start integrating GNU Screen into your daily routine today and unlock a new level of terminal mastery. What are your favorite Screen tips? Share them in the comments below!