Learning how to unzip files in Linux is a fundamental skill for any user navigating the command line. Compressed archives, often in the .zip format, are common for distributing software, documents, and collections of files efficiently. This guide will walk you through the essential commands and techniques to effortlessly decompress these archives on your Linux system. Understanding these steps ensures you can access your necessary data quickly and effectively.
Introduction to Unzipping Files in Linux
Linux environments heavily rely on the command line for many operations, including file management. Unzipping files is a routine task, crucial for developers, system administrators, and everyday users alike. This process involves extracting the original contents from a compressed .zip archive. Mastering this skill streamlines your workflow and enhances your productivity within the Linux ecosystem.
What are Compressed Files and Their Benefits?
Compressed files bundle multiple files and folders into a single archive, significantly reducing their overall size. This compression makes them ideal for storage and transmission, saving disk space and bandwidth. Furthermore, archives can be password-protected, adding a layer of security to your data during sharing. They are incredibly versatile for various applications.
- Space Efficiency: Reduces file sizes for storage.
- Faster Transfers: Speeds up downloads and uploads.
- Data Organization: Bundles related files into one package.
- Security: Allows for password protection of sensitive data.
The `unzip` Command: Your Primary Tool
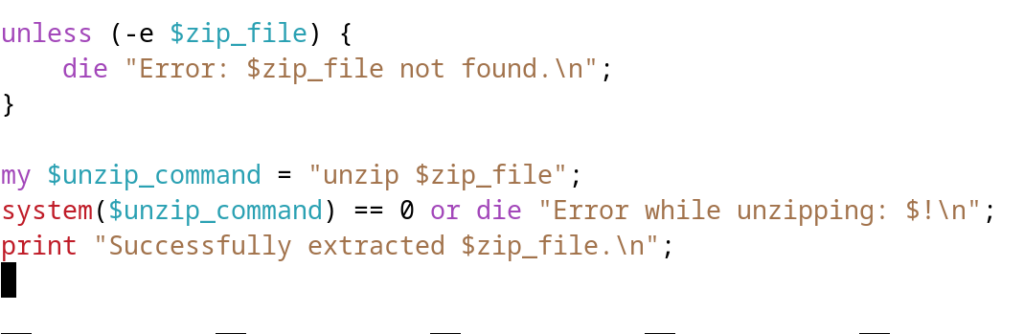
The `unzip` command is the standard utility for decompressing .zip archives in Linux. It is a powerful and flexible tool, offering various options for different extraction scenarios. You will use this command frequently when dealing with downloaded software or shared documents. Familiarity with its Basic syntax is key to efficient file management.
Quick Setup: Installing `unzip` on Linux
While many Linux distributions include `unzip` by default, some minimal installations might not. If the command is not found, you can easily install it using your distribution’s package manager. This quick setup ensures you have the necessary tools at your disposal. Always ensure your system is updated before installing new packages.
For Debian/Ubuntu-based systems, use:
sudo apt updatesudo apt install unzip
For Fedora/CentOS/RHEL systems, use:
sudo dnf install unzip
(or `sudo yum install unzip` for older versions)
Getting Started: The Basic `unzip` Command in Linux
The most straightforward way to unzip files in Linux involves a simple command syntax. This basic operation extracts all contents of a .zip archive into your current working directory. It is the starting point for most users needing to access compressed data. Always double-check your current directory before executing the command.
Basic Syntax: `unzip filename.zip`
To decompress a .zip file, navigate to the directory containing the archive using the `cd` command. Then, simply type `unzip` followed by the name of your .zip file. For example, if your file is named `my_archive.zip`, the command would be `unzip my_archive.zip`. This action will extract all files and folders contained within.

Extracting to the Current Directory
By default, `unzip` extracts all contents into the directory where the command is executed. This behavior is convenient for quick extractions when you want the files immediately accessible. However, it can sometimes clutter your current directory. Therefore, consider creating a dedicated folder for the extracted contents beforehand.
Verifying Extracted Files
After running the `unzip` command, it is good practice to verify that all files have been extracted correctly. You can use the `ls` command to list the contents of your current directory or the newly created subdirectory. This step confirms the successful decompression and ensures data integrity. If any files are missing, check the `unzip` command output for errors.
Advanced `unzip` Options for Specific Extraction Needs
Beyond basic extraction, the `unzip` command offers several powerful options to handle more specific scenarios. These options provide greater control over where and how files are extracted. Understanding them can significantly enhance your efficiency when managing archives. Consequently, you can tailor the unzipping process to your exact requirements.
Extracting to a Different Destination
Often, you might want to extract files to a directory other than the current one. The `-d` option allows you to specify a destination directory. For instance, `unzip my_archive.zip -d /path/to/new/folder` will place all extracted files in `/path/to/new/folder`. This keeps your working directory clean and organized. Remember to create the destination folder if it doesn’t exist.
Listing Archive Contents Without Extracting
Before extracting, you might want to see what’s inside a .zip file without actually decompressing it. The `-l` option (list) provides a detailed list of all files and directories within the archive. This is useful for previewing contents or checking for specific files. The command `unzip -l my_archive.zip` will display the archive’s structure and file sizes.
Extracting Specific Files or Directories
Sometimes, you only need a few files from a large archive, not everything. You can specify individual files or directories to extract by listing them after the archive name. For example, `unzip my_archive.zip file1.txt folder_name/*` will extract only `file1.txt` and all contents of `folder_name`. This saves time and disk space, particularly with large archives.
Here are some common options for selective extraction:
- `unzip -j`: Junk paths, extracts all files into the same directory, ignoring original folder structure.
- `unzip -x file_to_exclude.txt`: Excludes specific files from extraction.
- `unzip -n`: Never overwrite existing files.
How to Unzip Password-Protected Files in Linux
Dealing with encrypted archives is a common requirement when you unzip files in Linux. Password protection adds a vital layer of security to sensitive data. The `unzip` command handles these archives efficiently, prompting you for the correct password. It is crucial to use strong, unique passwords for maximum security.
Identifying Encrypted ZIP Archives
When you attempt to unzip a password-protected file without providing a password, the `unzip` command will typically prompt you for it. You might also see messages indicating “encrypted entry” during the listing phase. This behavior confirms that the archive requires a password for successful decompression. Always be prepared to enter credentials when dealing with secure files.
Using the `-P` Option for Passwords
For password-protected archives, use the `-P` option followed immediately by the password (no space). For example, `unzip -P YourSecretPassword my_secure_archive.zip`. Be cautious when typing passwords directly into the command line, as they might be visible in your shell history. For highly sensitive operations, the command will usually prompt you interactively, which is more secure.
Best Practices for Password Handling
When working with password-protected files, avoid hardcoding passwords in scripts or sharing them insecurely. Instead, let `unzip` prompt you for the password interactively. If automation is necessary, consider using secure environment variables or dedicated password management tools. Always remember to clear your terminal history after handling sensitive information. Learn more about the ZIP file format and its encryption capabilities on Wikipedia.
Common Issues and Troubleshooting When Unzipping Files
Even with a straightforward command like `unzip`, you might encounter issues. Understanding common problems and their solutions helps you troubleshoot effectively. This section covers typical error messages and provides actionable steps to resolve them. Patience and methodical checking are key to overcoming these challenges.
“Command Not Found” and Installation Issues
The most frequent issue is the “command not found” error, indicating `unzip` is not installed or not in your system’s PATH. Revisit the installation steps for your specific Linux distribution. Ensure you have the correct package manager command (`apt`, `dnf`, `yum`) and sufficient permissions (`sudo`). A quick installation usually resolves this problem.
Corrupted Archives and Data Integrity Errors
Sometimes, a .zip file might be corrupted during download or transfer, leading to extraction errors. The `unzip` command will often report “bad CRC” or “invalid compressed data.” In such cases, try redownloading the archive from its source. If the issue persists, the original file might be damaged. There are recovery tools, but they are not always successful.
Permission Denied and Ownership Problems
When extracting files, you might encounter “permission denied” errors. This usually means your current user lacks the necessary write permissions for the destination directory. Try extracting to a directory where you have full control, such as your home folder. Alternatively, use `sudo` with caution if you need to extract to system directories, understanding the security implications.
Best Practices for Managing Compressed Files in Linux
Beyond simply knowing how to unzip files in Linux, adopting best practices enhances your overall file management. Efficient handling of compressed data saves time, disk space, and potential headaches. These practices ensure a smooth and secure experience with archives. They apply to both creating and extracting files.
Creating ZIP Archives with the `zip` Command
Just as `unzip` extracts, the `zip` command creates archives. To compress files, use `zip archive_name.zip file1.txt folder/`. This command is the counterpart to `unzip` and completes your understanding of ZIP file management. You can also add options like `-r` for recursive archiving of directories. It’s a powerful tool for bundling your own data.
- Install `zip`: Use `sudo apt install zip` or `sudo dnf install zip`.
- Compress a file: `zip myfiles.zip file1.txt file2.pdf`
- Compress a directory: `zip -r myarchive.zip myfolder/`
- Add password protection: `zip -e mysecure.zip secretfile.txt` (will prompt for password).
Security Considerations for Downloaded Archives
Always exercise caution when downloading and unzipping archives from untrusted sources. Malicious actors can embed harmful scripts or executables within seemingly innocuous .zip files. Scan downloaded archives with antivirus software if available. Furthermore, consider extracting them in a sandboxed environment first. Your system’s security depends on vigilance.
Efficient File Organization
Maintain a clear and logical directory structure for your extracted files. Avoid cluttering your home directory with numerous extracted folders. Create dedicated subdirectories for projects or specific downloads. This practice makes it much easier to locate files later and keeps your system tidy. Good organization is a hallmark of an efficient Linux user.
- Dedicated Folders: Create specific directories for downloads.
- Consistent Naming: Use clear, descriptive names for