Navigating the Linux command line often involves managing compressed files. If you’ve encountered a `.gz` file and need to access its contents, understanding how to unzip (extract) a Gz file in Linux is a fundamental skill. This guide will walk you through the essential commands and techniques to decompress these common archive types efficiently. We will cover various methods, from Basic extraction to handling more complex `tar.gz` archives, ensuring you can confidently manage your files.
Understanding Gz Files and the Gzip Utility in Linux
Gzip is a popular file compression utility widely used in the Linux environment. It primarily focuses on compressing single files, making them smaller for storage or transmission. When you see a file ending with `.gz`, it signifies that it has been compressed using the Gzip algorithm.
The Nature of Gzip (.gz) Compressed Files
A `.gz` file is essentially a single file that has been run through the Gzip compression algorithm. This process reduces the file’s size significantly, which is beneficial for saving disk space and speeding up data transfers. However, unlike `.zip` files, `.gz` files typically only contain one compressed file, not an entire directory structure.
The Core Functionality of the Gzip Utility
The `gzip` utility is the standard tool for compressing and decompressing files in Linux. It is a powerful command-line program designed for efficiency. While `gzip` itself handles compression, its companion utility, `gunzip`, is specifically tailored for decompression tasks. Both are integral to managing `.gz` files.
Benefits of Using Gzip for File Compression
Using Gzip offers several advantages for Linux users. It provides excellent compression ratios, especially for text-based files like logs or source code. Furthermore, Gzip is a standard utility, meaning it’s almost always available on any Linux distribution. This makes it a reliable choice for system administrators and developers alike. You can learn more about Gzip’s history and features on its Wikipedia page.
The Basic Way: How to Unzip Gz File in Linux Using gunzip
The most straightforward method to decompress a `.gz` file in Linux is by using the `gunzip` command. This utility is specifically designed for uncompressing files that were compressed with `gzip`. It’s simple, efficient, and widely available on all Linux systems.
Syntax and Fundamental Usage of the gunzip Command
The basic syntax for `gunzip` is very simple: `gunzip [options] filename.gz`. When you run this command, `gunzip` will decompress the specified file. By default, it will also delete the original `.gz` file after successful extraction, leaving you with the uncompressed version. This behavior can be modified with specific options.
Extracting a Single .gz File with gunzip
To extract a single `.gz` file, navigate to the directory containing the file using your terminal. Then, execute the `gunzip` command followed by the file’s name. For example, if you have a file named `my_document.txt.gz`, the command would be `gunzip my_document.txt.gz`. This will create `my_document.txt` in the same directory.

Decompressing Multiple .gz Files Simultaneously
You can also decompress multiple `.gz` files at once using `gunzip`. Simply list all the files you wish to extract after the command, separated by spaces. Alternatively, you can use a wildcard character, like `*`, to decompress all `.gz` files in the current directory. This is a powerful way to manage many compressed files efficiently.
Here are common ways to use `gunzip`:
- Extract a single file: `gunzip myfile.txt.gz`
- Extract multiple files: `gunzip file1.gz file2.gz`
- Extract all .gz files in a directory: `gunzip *.gz`
Alternative Method: Extracting Gz Files with the gzip -d Command
While `gunzip` is the dedicated tool, the `gzip` command itself also offers a decompression option. This alternative method provides the same functionality as `gunzip` and can be useful if you prefer to stick with a single utility for both compression and decompression tasks. Understanding both methods gives you flexibility.
Understanding the Decompression Option (-d) for gzip
The `gzip` command uses the `-d` flag to indicate decompression. When you append `-d` to the `gzip` command, it behaves identically to `gunzip`. This means it will decompress the specified `.gz` file and, by default, remove the original compressed file. It’s a convenient way to remember one command for two related operations.
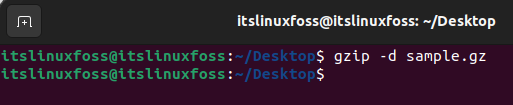
Step-by-Step Guide to Using gzip -d for Extraction
The process for using `gzip -d` is straightforward. First, open your Linux terminal and navigate to the directory where your `.gz` file is located. Then, type `gzip -d` followed by the name of your compressed file. For instance, to extract `archive_data.log.gz`, you would run `gzip -d archive_data.log.gz`. This will produce `archive_data.log`.
Comparing gunzip vs. gzip -d: Which to Choose?
Functionally, `gunzip` and `gzip -d` are identical; they both perform the same decompression task. The choice between them often comes down to personal preference or habit. Many users find `gunzip` more intuitive as its name explicitly states its purpose. However, using `gzip -d` can simplify muscle memory if you frequently use `gzip` for compression. Both methods effectively show how to unzip (extract) a Gz file in Linux.
Handling Tar.gz Files: Extracting Compressed Archives in Linux
Often, you won’t encounter just a `.gz` file but rather a `.tar.gz` file, also known as a “tarball.” These files are a combination of `tar` (tape archive) and `gzip` compression. `tar` groups multiple files or directories into a single archive, which is then compressed by `gzip`. Extracting these requires a slightly different approach.
What are .tar.gz (Tarball) Files and Their Structure?
A `.tar.gz` file is a two-step archive. First, the `tar` utility bundles several files and directories into a single `.tar` archive. Then, this `.tar` archive is compressed using `gzip`, resulting in a `.tar.gz` extension. This method is popular for distributing software source code or large collections of files, as it maintains directory structures.
How to Extract .tar.gz Files Using the tar -xzf Command
To extract a `.tar.gz` file, you typically use the `tar` command with specific flags. The most common command is `tar -xzf filename.tar.gz`. Here, `-x` means extract, `-z` tells `tar` to decompress with `gzip`, and `-f` specifies the input file. This command will both decompress and extract the archive, placing its contents in the current directory.
Here’s a numbered list for extracting a `tar.gz` file:
- Open your terminal.
- Navigate to the directory containing the `.tar.gz` file.
- Execute the command: `tar -xzf your_archive.tar.gz`
- The contents will be extracted into the current directory.
Extracting Tar.gz Files to a Specific Directory
Sometimes, you might want to extract a `tar.gz` archive to a different location. You can achieve this by adding the `-C` (change directory) option to your `tar` command. For example, `tar -xzf my_software.tar.gz -C /opt/new_install` would extract `my_software.tar.gz` into the `/opt/new_install` directory. This is crucial for maintaining an organized file system.
Advanced Gz Extraction Techniques and Options
Beyond basic extraction, `gunzip` and `gzip` offer several advanced options that provide greater control over the decompression process. These options can be particularly useful in scripting or when dealing with specific file management requirements. Mastering them enhances your ability to how to unzip (extract) a Gz file in Linux effectively.
Keeping the Original .gz File After Extraction
By default, `gunzip` and `gzip -d` delete the original `.gz` file after successful decompression. If you wish to keep the original compressed file, you can use the `-k` (keep) option. For instance, `gunzip -k my_log.gz` will extract `my_log` and retain `my_log.gz`. This is useful for backups or verification purposes.
Listing Contents of a .gz File Without Full Decompression
Sometimes, you just need to see what’s inside a `.gz` file without fully decompressing it. The `gzip -l` command can list compressed file information, including the uncompressed size and compression ratio. While it doesn’t show the actual content, it provides metadata. For `tar.gz` files, `tar -tf filename.tar.gz` will list the contents of the archive without extraction.
Extracting to Standard Output for Pipelining
For advanced scripting, you might want to decompress a `.gz` file and pipe its output directly to another command, rather than saving it to a file. Both `gunzip -c` and `gzip -dc` achieve this by writing the decompressed data to standard output. For example, `gunzip -c access.log.gz | grep “error”` would decompress `access.log.gz` and immediately search for “error” within its content. This is a powerful feature for data processing.
Common Issues When Unzipping Gz Files and How to Troubleshoot
Even with straightforward commands, you might encounter issues when trying to how to unzip (extract) a Gz file in Linux. Understanding common errors and their solutions will save you time and frustration. Most problems stem from incorrect file paths, corrupted files, or insufficient permissions.
Resolving ‘No Such File or Directory’ Errors
This error typically means the file path you provided is incorrect or the file doesn’t exist in the current directory. Always double-check the filename and its location. Use `ls` to list files in the current directory. Ensure you’ve typed the name exactly, including case sensitivity. If the file is in another directory, provide its full path or navigate to its location first.
Dealing with ‘Not in Gzip Format’ Messages
If you see an error like “gzip: filename.gz: not in gzip format,” it indicates that the file is not actually a valid `.gz` file, despite its extension. It might be corrupted, or it could be compressed with a different utility (e.g., `.zip`, `.bz2`). You can try using the `file` command (`file filename.gz`) to determine the actual file type. This helps identify the correct decompression tool.
Troubleshooting Permissions Denied Issues During Extraction
A “Permission denied” error means you don’t have the necessary rights to read the `.gz` file or write the uncompressed file to the target directory. Check file permissions using `ls -l` and directory permissions using `ls -ld`. You might need to use `sudo` to run the `gunzip` or `tar` command with administrative privileges, or change the file/directory permissions using `chmod` or `chown`. Always exercise caution when using `sudo`.
Frequently Asked Questions
What is the difference between .gz and .zip files?
The primary difference lies in their design. A `.gz` file typically compresses a single file, while a `.zip` file can compress multiple files and directories into a single archive. `.zip` files also include a directory structure within the archive, making them more suitable for bundling complex projects. Gzip is generally better for single-file compression, offering good ratios.
Can I extract .gz files on Windows or macOS?
Yes, you can extract `.gz` files on both Windows and macOS. On macOS, the built-in Archive Utility can often handle `.gz` files directly. For Windows, you’ll need third-party software like 7-Zip or WinRAR. These tools provide graphical interfaces for easy decompression, making it simple to how to unzip (extract) a Gz file in Linux content on other OSes.
How do I compress a file into .gz format in Linux?
To compress a file into `.gz` format, you use the `gzip` command. For example, `gzip my_document.txt` will compress `my_document.txt` into `my_document.txt.gz` and remove the original `my_document.txt`. You can use the `-k` option (`gzip -k my_document.txt`) to keep the original file if desired.
Is it safe to delete the original .gz file after extraction?
Generally, yes, it is safe to delete the original `.gz` file after successful extraction, especially if you have verified the integrity of the uncompressed data. The `gunzip` command, by default, deletes the original `.gz` file. However, if you need to retain the compressed version for Backup or archival purposes, use the `-k` option during extraction.
Conclusion
Mastering how to unzip (extract) a Gz file in Linux is an indispensable skill for anyone working in the Linux environment. We’ve explored the fundamental `gunzip` command, its `gzip -d` alternative, and the crucial `tar -xzf` command for handling `tar.gz` archives. Additionally, we covered advanced options and troubleshooting common issues, empowering you to manage compressed files with confidence.
By understanding these commands, you can efficiently handle data, manage disk space, and navigate various software distributions. Continue practicing these commands in your terminal to solidify your knowledge. Explore other Linux compression utilities like `bzip2` and `xz` to further expand your command-line expertise. What other Linux commands do you find most useful? Share your thoughts in the comments below!