The Ping Command in Linux is an indispensable network utility. It helps administrators and users diagnose network connectivity issues quickly and efficiently. This fundamental tool sends ICMP (Internet Control Message Protocol) echo request packets to a target host. Subsequently, it waits for an ICMP echo reply. Understanding this command is crucial for anyone managing or troubleshooting Linux systems.
Understanding the Ping Command in Linux: A Core Network Utility
The Ping command serves as a primary diagnostic tool for network administrators. It verifies if a host is reachable across an IP network. Essentially, it measures the round-trip time for messages sent from the originating host to a destination computer. This simple yet powerful utility is available on virtually all operating systems, including every major Linux distribution.
What is the Ping Command and Its Core Function?
The Ping command’s name comes from active sonar technology, which sends out a pulse and listens for an echo. Similarly, the command sends out network packets and listens for replies. Its core function is to test the reachability of a host on an Internet Protocol (IP) network. Furthermore, it measures the time it takes for packets to travel to the host and back.
This utility provides vital information about network latency and packet loss. It helps identify if a remote server is down or if there are connectivity problems. For instance, if you cannot access a website, a quick ping can tell you if the server is responding at all. Therefore, it is often the first step in any network troubleshooting process.
Why is Ping Essential for Linux Network Diagnostics?
Ping is essential because it offers immediate feedback on network status. It confirms Basic IP connectivity between two devices. Without it, diagnosing even simple connection failures would be significantly more complex. Moreover, it helps in identifying slow network segments or overloaded servers.
Consider these key reasons for its importance:
- Connectivity Verification: Confirms if a host is alive and reachable.
- Latency Measurement: Provides round-trip time, indicating network speed.
- Packet Loss Detection: Shows if data packets are being dropped during transmission.
- Basic Troubleshooting: Quickly isolates network problems to a specific segment or device.
How the Ping Command in Linux Works Under the Hood
The Ping command operates at the network layer of the TCP/IP model. It leverages the Internet Control Message Protocol (ICMP) for its operations. This protocol is fundamental for error reporting and operational information concerning IP packet processing. Understanding its mechanics helps in interpreting the output more effectively.
The Role of ICMP in Ping Operations
ICMP is a crucial component of the Internet Protocol suite. It is primarily used by network devices, including routers, to send error messages and operational information. When you execute the Ping Command in Linux, it sends an ICMP Echo Request packet to the target host. The target host, if reachable, responds with an ICMP Echo Reply packet.
This exchange of request and reply packets forms the basis of the ping operation. Without ICMP, there would be no standardized way for hosts to communicate basic network status. Therefore, ICMP is not for Data Transfer, but for network control and diagnostics. You can learn more about ICMP on Wikipedia.
Packet Transmission Flow and Network Layers Involved
When you initiate a ping, the process involves several network layers. First, the application layer requests a ping. Then, the operating system’s network stack constructs an ICMP Echo Request packet. This packet is encapsulated within an IP packet at the network layer. Finally, it is sent out over the physical network interface.
Upon reaching the destination, the target host’s network stack processes the incoming IP packet. It recognizes the ICMP Echo Request and generates an ICMP Echo Reply. This reply packet then travels back to the originating host through the same network layers. The time taken for this round trip is precisely what the Ping command measures.
Decoding Round Trip Time (RTT) and Its Significance
Round Trip Time (RTT) is the duration from the moment the ping packet is sent until the echo reply is received. This metric is displayed in milliseconds (ms) in the ping output. RTT is a direct indicator of network latency. A lower RTT signifies a faster and more responsive network connection.
High RTT values can point to network congestion, slow routing paths, or an overloaded destination server. Monitoring RTT over time can help identify performance degradation. Furthermore, significant fluctuations in RTT might indicate unstable network conditions. It is a critical metric for assessing network health.
Essential Ping Command Options and Basic Syntax
The basic syntax for the Ping Command in Linux is straightforward, but it offers many options for customization. These options allow users to tailor the command’s behavior for specific diagnostic needs. Knowing these fundamental options enhances the utility of the ping tool significantly.
Basic Syntax: `ping [destination]` with Examples
The most basic way to use the Ping command is by simply specifying a destination. This destination can be an IP address or a hostname. For example, `ping google.com` will send ICMP echo requests to Google’s servers. Similarly, `ping 8.8.8.8` targets Google’s public DNS server directly by its IP address.
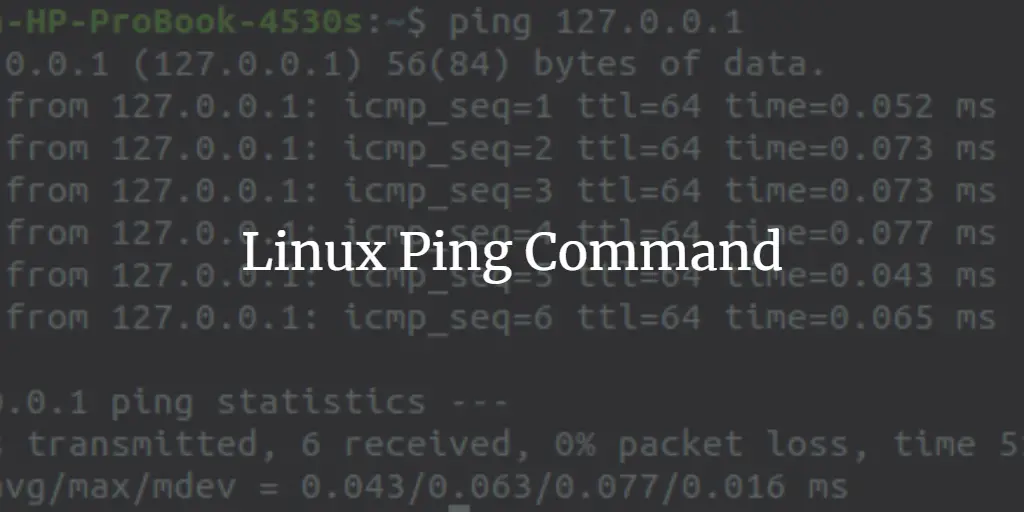
The command will continuously send packets until manually stopped. To stop the ping process, you typically press `Ctrl+C`. This action terminates the command and displays a summary of the results. This summary includes packet statistics like transmitted, received, and lost packets, along with average RTT.
Limiting Ping Counts with the `-c` Option
Often, you don’t need an endless stream of ping results. The `-c` option allows you to specify the number of echo requests to send. For instance, `ping -c 5 google.com` will send exactly five packets to google.com and then automatically stop. This is particularly useful for quick checks without manual intervention.
Using the count option helps conserve network resources and provides a concise snapshot of connectivity. It’s a common practice when scripting network tests or performing automated checks. This option ensures that the command executes for a predefined duration, making it efficient.
Setting Ping Intervals with the `-i` Option
By default, the Ping command sends one packet per second. However, you can adjust this interval using the `-i` option. For example, `ping -i 0.5 google.com` will send packets every half-second. This can be useful for more rapid testing or for observing very short-term network fluctuations.
Conversely, you might want to increase the interval to reduce network load during prolonged monitoring. For example, `ping -i 5 google.com` sends a packet every five seconds. This flexibility allows for fine-tuning the ping behavior to suit various diagnostic scenarios. Remember that very small intervals might require root privileges on some systems.
Advanced Ping Command Usage for Network Troubleshooting
Beyond the basic options, the Ping Command in Linux offers advanced functionalities. These are invaluable for deeper network troubleshooting. Leveraging these options allows for more precise diagnostics and a better understanding of network behavior. They help pinpoint specific issues that simple pings might miss.
Customizing Packet Size with the `-s` Option
The `-s` option allows you to specify the size of the data payload in the ICMP echo request packet. The default size is 56 bytes (which becomes 84 bytes including the ICMP header). For example, `ping -s 1000 google.com` sends packets with a 1000-byte payload. This can help test network performance with larger data transfers.
Testing with larger packets can reveal issues like MTU (Maximum Transmission Unit) mismatches or fragmentation problems. If large packets fail while small ones succeed, it often indicates a problem with packet fragmentation or a router’s MTU setting. This option provides a more realistic test of network capacity.

Pinging Specific Network Interfaces with `-I`
On systems with multiple network interfaces, you might need to specify which interface to use for sending ping packets. The `-I` option allows you to do this. For example, `ping -I eth0 google.com` will send packets specifically from the `eth0` interface. This is crucial for troubleshooting multi-homed servers.
This option ensures that traffic originates from the intended source IP address. It helps verify routing configurations and firewall rules tied to specific interfaces. Without it, the system might choose an unexpected interface, leading to misleading diagnostic results. Therefore, it is a powerful tool for complex network setups.
Disabling DNS Resolution for Faster Pings with `-n`
By default, the Ping command attempts to resolve the IP address of the destination hostname. It also tries to resolve the IP addresses of the responding hosts back to hostnames. The `-n` option disables this DNS resolution. For example, `ping -n google.com` will only display IP addresses in its output.
Disabling DNS resolution can speed up the ping process, especially when DNS servers are slow or unreachable. It’s also useful when you want to confirm connectivity to an IP address without the overhead of DNS lookups. This option provides raw IP-level connectivity information, which is often preferred for core network diagnostics.
Interpreting Ping Output and Diagnosing Issues
The output of the Ping Command in Linux contains valuable information. Learning to interpret this data is key to effective network troubleshooting. Each line and summary statistic tells a story about your network’s health. Therefore, understanding these details helps in quickly diagnosing problems.
Decoding TTL (Time To Live) Values and Their Meaning
TTL, or Time To Live, is a value in the IP header that indicates the maximum number of hops a packet can take before being discarded. Each router that forwards the packet decrements the TTL value. When TTL reaches zero, the packet is dropped, preventing endless loops. In ping output, you’ll see the remaining TTL value.
A typical TTL for Linux systems is 64, Windows is 128, and Cisco routers often use 255. A lower TTL than expected might indicate a longer route or an issue with intermediate devices. For example, if you ping a server and see a TTL of 50, it means there were 14 hops between your machine and the server (assuming an initial TTL of 64). Analyzing TTL can help map network paths.
Analyzing Packet Loss and Latency Spikes
Packet loss occurs when some of the sent ICMP echo requests do not receive a corresponding echo reply. The ping summary shows the percentage of packet loss. Any packet loss, especially above 0%, indicates a problem. This could be due to network congestion, faulty cabling, overloaded routers, or firewall issues.
Latency spikes are sudden increases in the RTT values. While average RTT is important, consistent spikes suggest intermittent network problems. These spikes can lead to poor application performance and user experience. Both packet loss and latency spikes demand further investigation into the network infrastructure.
Troubleshooting Common Errors: ‘Destination Host Unreachable’ and ‘Request Timed Out’
Two common error messages from the Ping command are “Destination Host Unreachable” and “Request Timed Out.” “Destination Host Unreachable” typically means that a router on the path to the destination cannot find a route to the target host. This often points to a routing table issue or a firewall blocking ICMP at an intermediate point.
“Request Timed Out” means that the ping request was sent, but no reply was received within the default timeout period. This could indicate that the destination host is down, a firewall is blocking ICMP at the destination, or there’s severe network congestion causing packets to be dropped. Both errors require systematic troubleshooting, often starting with checking local network configurations and firewalls.
Frequently Asked Questions About the Ping Command in Linux
Many users have common questions regarding the Ping Command in Linux. Addressing these helps clarify its usage and limitations. These answers provide practical advice for everyday network tasks.
What is the difference between `ping` and `traceroute` in Linux?
While both `ping` and `traceroute` are network diagnostic tools, they serve different primary purposes. `ping` primarily tests reachability and measures the round-trip time to a single destination. It gives you an overall picture of connectivity. `traceroute`, on the other hand, maps the path that packets take to reach a destination. It identifies each router (hop) along the way and the time taken to reach each hop. This helps pinpoint exactly where a connection breaks or slows down.
How do you stop a running `ping` command and what if it fails?
You can stop a running `ping` command in Linux by pressing `Ctrl+C` in the terminal. This sends an interrupt signal to the process, causing it to terminate and display a summary of the packets sent and received. If `ping` fails to stop, it might indicate a hung terminal or a severely overloaded system. In such rare cases, you might need to open a new terminal and use `killall ping` or `pkill ping` to forcefully stop the process.
Can `ping` check specific ports or be disabled on a Linux server?
No, the `ping` command cannot check specific ports. `ping` operates at the network layer (Layer 3) using ICMP, which is not port-aware. Ports are a concept of the transport layer (Layer 4), used by protocols like TCP and UDP. To check if a specific port is open on a remote host, you would typically use tools like `netcat` (nc), `nmap`, or `telnet`. As for disabling `ping`, you can configure a Linux server’s firewall (e.g., `iptables` or `firewalld`) to block incoming ICMP echo requests, effectively making the server unresponsive to pings.
Conclusion: Leveraging the Ping Command for Robust Linux Networks
The Ping Command in Linux remains an essential utility for anyone working with networks. From basic connectivity checks to advanced troubleshooting, its versatility is unmatched. Mastering its various options and understanding its output empowers users to quickly diagnose and resolve network issues. It is often the first line of defense against connectivity problems.
Recap: The Indispensable Power of the Ping Command
We’ve explored the core functions of the Ping command, its reliance on ICMP, and how to interpret its output. We also covered essential and advanced options that tailor its behavior for specific diagnostic tasks. The Ping command provides immediate, actionable insights into network health, latency, and packet loss. Its simplicity combined with its power makes it truly indispensable for maintaining robust Linux networks.
Next Steps: Further Network Diagnostics and Security Best Practices
While the Ping command is powerful, it’s just one tool in a comprehensive network diagnostic toolkit. Consider exploring other utilities like `traceroute` for path analysis, `netstat` for active connections, and `nmap` for port scanning. Additionally, always follow security best practices, such as configuring firewalls to control ICMP traffic, to protect your Linux systems. Continue learning and experimenting with these tools to become a proficient network troubleshooter.