Navigating the Linux file system efficiently is a fundamental skill for any user, developer, or system administrator. The Find Command in Linux (Find Files and Directories) is an incredibly powerful utility designed for this very purpose. It allows you to search for files and directories based on a wide range of criteria, making complex file management tasks straightforward. Before diving in, let’s clarify that mastering this command significantly enhances your productivity and control over your Linux environment.
Understanding the Find Command in Linux (Find Files and Directories)
The `find` command is a standard utility on Unix-like operating systems, including Linux. It recursively searches for files and directories within a specified directory hierarchy. This versatile tool can locate items based on their names, types, sizes, modification times, permissions, owners, and much more. Therefore, it is an indispensable part of any Linux user’s toolkit.
What is the Linux Find Command?
At its core, the Linux `find` command is a command-line utility for exploring the file system. It starts searching from a given path and traverses all subdirectories to locate files and directories that match your criteria. This deep search capability distinguishes it from simpler commands like `ls` or `grep`, which typically operate on the current directory or file contents.
Why is Finding Files and Directories Essential in Linux?
Efficiently locating files and directories is crucial for system maintenance, development, and troubleshooting. Whether you need to find configuration files, old log files, specific source code, or simply organize your data, the `find` command provides the precision needed. Furthermore, it helps automate tasks by allowing you to execute other commands on the found items. This capability is a game-changer for many administrative scripts.
Brief Overview of Find Command Capabilities
The `find` command offers an extensive array of options to refine your searches. You can combine multiple criteria to pinpoint exactly what you need. For instance, you might search for all text files larger than 1MB that were modified in the last week. This flexibility makes the Find Command in Linux (Find Files and Directories) a truly robust tool.
- Search by name, type, size, and time.
- Filter by owner, group, and permissions.
- Execute external commands on search results.
- Control search depth and path exclusions.
Basic-find-command-usage-syntax-and-name-searches">Basic Find Command Usage: Syntax and Name Searches
Understanding the fundamental syntax of the `find` command is the first step to harnessing its power. The basic structure involves specifying a starting path, followed by various options and expressions. This allows you to define exactly what you are looking for.
Understanding the `find` Command Structure and Default Behavior
The general syntax for the `find` command is `find [path] [expression]`. If you omit the path, `find` defaults to the current directory. The expression consists of options, test criteria, and actions. For example, `find . -name “myfile.txt”` searches the current directory and its subdirectories for a file named “myfile.txt”.
Finding Files by Name: Case-Sensitive and Case-Insensitive (`-name`, `-iname`)
Searching by name is one of the most common uses for the `find` command. The `-name` option performs a case-sensitive search. However, if you need to ignore case, the `-iname` option is incredibly useful. For instance, `find /home -iname “document.pdf”` will locate “document.pdf”, “Document.pdf”, or “DOCUMENT.PDF” within the `/home` directory. This flexibility helps when you are unsure of the exact casing.
Leveraging Wildcards and Excluding Paths for Precise Searches
Wildcards like `` (matches any sequence of characters) and `?` (matches any single character) are powerful with `-name` or `-iname`. For example, `find . -name “.log”` finds all files ending with `.log`. Additionally, you can exclude specific directories from your search using the `-prune` option with `-path`. This helps narrow down your search results significantly. For more advanced wildcard usage, refer to shell scripting guides.
Locating Files and Directories by Type, Owner, and Permissions
Beyond names, the `find` command allows you to filter results based on their fundamental attributes. This includes whether an item is a file, directory, or symbolic link, as well as who owns it and what permissions it has. These criteria are essential for system administration tasks.
Searching by File Type (`-type f`, `-type d`, `-type l`)
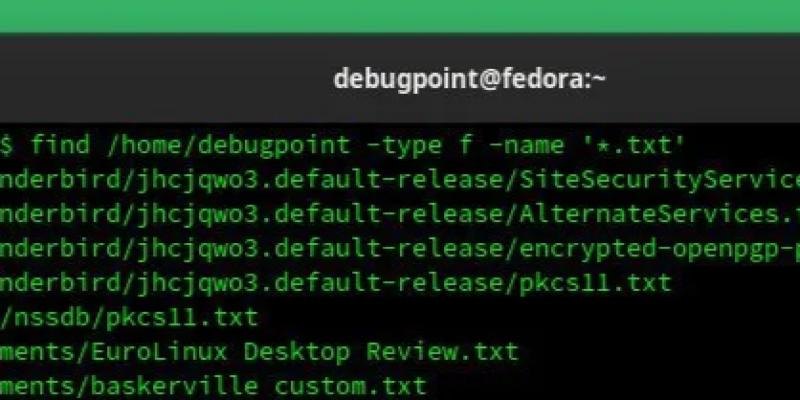
The `-type` option lets you specify the kind of file you are looking for. Using `f` for regular files, `d` for directories, and `l` for symbolic links are common choices. For example, `find /var/log -type f -name “*.log”` will specifically locate regular log files, ignoring any directories that might coincidentally end with `.log`. This ensures you get only the relevant results.
Finding Files by Permissions (`-perm`)
Permissions are crucial in Linux for security and access control. The `-perm` option allows you to search for files based on their exact or minimum permission settings. For instance, `find . -perm 644` searches for files with read/write for owner, and read-only for group and others. You can also use a leading `/` to find files with at least the specified permissions, or `-` for all bits set. This is vital for security audits.
Searching by File Owner and Group (`-user`, `-group`)
You can easily find files owned by a specific user or group using the `-user` and `-group` options. This is especially helpful in multi-user environments. For example, `find /home -user john` will list all files and directories owned by the user ‘john’ within the `/home` directory. Similarly, `find /srv -group developers` can locate all items belonging to the ‘developers’ group. This helps manage shared resources effectively.
Advanced Find Command Techniques: Size, Time, and Depth
The `find` command’s true power emerges with its advanced options for filtering by size, modification times, and search depth. These capabilities allow for highly specific and efficient searches, which are invaluable for system maintenance and data management. Therefore, understanding these options is key to mastering the Find Command in Linux (Find Files and Directories).
Finding Files by Size (`-size`)
The `-size` option lets you search for files based on their size. You can specify sizes in blocks (default), bytes (`c`), kilobytes (`k`), megabytes (`M`), or gigabytes (`G`). For example, `find . -size +10M` will find all files larger than 10 megabytes. Conversely, `-10M` finds files smaller than 10 megabytes, and `10M` finds files exactly 10 megabytes. This is useful for identifying large files consuming disk space.
Searching by Modification, Access, or Change Time (`-mtime`, `-atime`, `-ctime`)
Time-based searches are incredibly powerful for managing dynamic data.
- `-mtime`: Finds files based on their last modification time (when content was changed).
- `-atime`: Searches by last access time (when content was read).
- `-ctime`: Locates files by last change time (when metadata or content was changed).
Controlling Search Depth (`-maxdepth`, `-mindepth`)
Sometimes you only want to search within a specific range of subdirectories. The `-maxdepth` and `-mindepth` options control how deep `find` will traverse. `-maxdepth N` limits the search to N levels below the starting directory, while `-mindepth N` starts searching only from N levels deep. For example, `find . -maxdepth 1 -type d` lists only directories in the current folder, without going into subdirectories. This prevents unnecessarily long searches.
Executing Actions on Found Files with the Find Command
One of the most powerful features of the `find` command is its ability to execute other commands on the files or directories it locates. This transforms `find` from a mere search tool into a powerful automation engine. Consequently, many system administration tasks rely heavily on this functionality.

Running Commands on Found Files (`-exec`)
The `-exec` option allows you to run an arbitrary command on each file or directory found. The syntax is `find … -exec command {} ;`. Here, `{}` is a placeholder for the found item’s path, and `;` terminates the `-exec` command. For example, `find . -name “*.tmp” -exec rm {} ;` will delete all files ending with `.tmp` in the current directory and its subdirectories. This is a very efficient way to perform bulk operations.
Interactive Execution with `-ok`
If you want to confirm each action before it’s executed, use `-ok` instead of `-exec`. The syntax is identical: `find … -ok command {} ;`. This prompts you for confirmation for every file. For instance, `find . -name “*.bak” -ok rm {} ;` will ask “Remove ‘./file.bak’? y/n?” before deleting each `.bak` file. This provides a safety net, especially when dealing with critical files.
Combining `find` with `xargs` for Efficiency
For commands that can handle multiple arguments at once, combining `find` with `xargs` is often more efficient than `-exec`. The syntax is `find … -print0 | xargs -0 command`. The `-print0` and `-0` options handle filenames with spaces correctly. For example, `find . -name “*.old” -print0 | xargs -0 rm` deletes all `.old` files. This can significantly speed up operations on a large number of files. You can learn more about `xargs` on Wikipedia here.
Practical Use Cases and Best Practices for Finding Files in Linux
The versatility of the `find` command makes it indispensable for a wide array of practical scenarios. From routine system cleanup to complex data organization, knowing how to apply `find` effectively can save significant time and effort. Therefore, understanding these use cases is crucial for any Linux user.
Finding and Deleting Empty Files or Directories
System clutter often includes empty files or directories that serve no purpose. You can easily locate and remove these using `find`. For example, `find . -empty -type f -delete` will delete all empty files in the current directory. Similarly, `find . -empty -type d -delete` removes empty directories. This is a great way to keep your file system tidy and reclaim disk space.
Locating and Managing Old Log Files
Log files can quickly consume disk space if not managed. The `find` command is perfect for identifying old logs that can be archived or deleted. For instance, `find /var/log -name “*.log” -mtime +30 -exec gzip {} ;` will compress all log files older than 30 days in `/var/log`. This helps maintain system performance and prevents disk overflow. Furthermore, you can adjust the `-mtime` value to suit your retention policies.
Performance Tips and Common Pitfalls When Using Find
When using `find`, especially on large file systems, performance can be a concern. Always specify the most restrictive criteria first to minimize the number of files processed. Avoid searching the root directory (`/`) without specific paths or depth limits, as this can take a very long time. Additionally, be extremely careful with `-exec rm` or `-delete`, always test your `find` command first without the delete action to ensure it targets the correct files. For example, use `-print` instead of `-delete` initially.
Frequently Asked Questions
How do I find files recursively in Linux?
The `find` command searches recursively by default from the specified starting path. For example, `find /home/user -name “report.txt”` will search `/home/user` and all its subdirectories for “report.txt”. You do not need any special flags for recursive searching; it’s the standard behavior of the Find Command in Linux (Find Files and Directories).
What is the difference between `find` and `locate` commands?
The `find` command searches the file system in real-time, providing up-to-date results based on current file system conditions. In contrast, `locate` searches a pre-built database (typically updated daily by `updatedb`). `locate` is much faster but may return outdated results. Therefore, `find` is better for precise, real-time searches, while `locate` is good for quick, general searches.
Can I search for multiple file types or names simultaneously?
Yes, you can combine multiple search criteria using logical operators like `-o` (OR) and `-a` (AND, which is implicit). For example, `find . -name “.txt” -o -name “.pdf”` will find files ending in either `.txt` or `.pdf`. Parentheses can be used for grouping, but they must be escaped: `find . ( -name “.jpg” -o -name “.png” ) -size +1M`. This allows for highly complex search patterns.
How to find files that contain specific text?
The `find` command itself does not search file contents. However, you can combine it with `grep` using the `-exec` option. For example, `find . -type f -name “*.log” -exec grep -l “error” {} ;` will find all `.log` files that contain the word “error”. The `-l` option in `grep` prints only the filename, not the matching lines. This is a powerful combination for content-based searches.
How do I limit the search to the current directory only?
To limit the search to the current directory and prevent `find` from descending into subdirectories, use the `-maxdepth 1` option. For example, `find . -maxdepth 1 -type f -name “*.conf”` will only list configuration files directly within the current directory, ignoring any in subfolders. This is very useful when you only need a shallow search.
Conclusion: Master the Find Command for Linux File Management
The Find Command in Linux (Find Files and Directories) is an indispensable tool for anyone working with a Linux system. Its extensive options for searching by name, type, size, time, and permissions provide unparalleled control over file system exploration. Furthermore, the ability to execute commands on found items transforms it into a powerful automation utility. Mastering `find` significantly boosts your efficiency and command-line prowess.
Recap of the Power of the Linux Find Command
We’ve explored the basic syntax, advanced filtering options, and the critical `-exec` functionality. From simple name searches to complex time-based queries and executing actions on multiple files, `find` offers a solution. It is truly a cornerstone of effective Linux file management. Therefore, consistent practice will solidify your understanding.
Encouragement for Continued Practice and Exploration
The best way to become proficient with the `find` command is through hands-on practice. Experiment with different options and combine them to solve specific problems. The more you use it, the more intuitive its syntax and capabilities will become. You will discover new ways to streamline your daily tasks.
Call to Action: Enhance Your Linux File Management Skills
Don’t just read about it; try it! Open your terminal and start experimenting with the `find` command today. Share your favorite `find` command tricks in the comments below, or ask any questions you might have. Elevate your Linux file management skills and become a true command-line master!