Before diving in, let’s clarify what Chown Command in Linux (File Ownership) actually means and why it’s so vital for system administration. This powerful command allows you to change the user and/or group ownership of files and directories. Understanding its proper usage is fundamental for maintaining system security, managing user access, and ensuring smooth operation of your Linux environment. This article will guide you through mastering the chown command, covering its syntax, practical examples, and essential best practices.
Introduction to Chown Command in Linux (File Ownership)
The chown command stands for “change owner,” and it’s a cornerstone utility in Linux and Unix-like operating systems. It grants administrators precise control over who owns specific files and directories. Correct file ownership is not just about organization; it directly impacts system security and prevents unauthorized access or modifications.
What is File Ownership in Linux?
In Linux, every file and directory has an owner and an associated group. The owner is typically the user who created the file. The group is a collection of users who share specific access rights to that file. This dual ownership model provides a robust framework for managing permissions and access control within the system.
Understanding ownership is crucial. It dictates who can read, write, or execute a file. For instance, the root user often owns critical system files. Changing ownership incorrectly can lead to severe security vulnerabilities or system instability. Therefore, careful consideration is always necessary when modifying these attributes.
Why is File Ownership Important for Security and Management?
File ownership is paramount for maintaining a secure and stable Linux system. It forms the first line of defense against unauthorized access. By assigning appropriate owners, you can restrict who has the ability to modify or even view sensitive data. This prevents malicious users or processes from compromising your system.
Furthermore, proper ownership simplifies system management. It allows different users or services to operate with their own designated files without interfering with others. For example, a web server process might own its configuration files and web content. This ensures that only the web server user can modify those specific files, enhancing overall system integrity.
Understanding the Chown Command Syntax and Options
The chown command’s syntax is straightforward, yet it offers significant flexibility through various options. Mastering this syntax is key to effectively managing file ownership. It allows you to specify the new owner, the new group, or both, for any given file or directory.
Basic-chown-syntax-user-group-and-file">Basic Chown Syntax: User, Group, and File
The fundamental syntax for the chown command is chown [OPTIONS] USER[:GROUP] FILE(s). Here, USER refers to the new owner’s username or User ID (UID). Optionally, GROUP specifies the new group name or Group ID (GID). You can apply this command to one or multiple files or directories.
For example, to change only the user owner, you would use chown newuser filename. To change only the group owner, you would use chown :newgroup filename or chown .newgroup filename. Remember, only the root user or a user with sudo privileges can execute this command on files they do not own.
Key Options for Chown (e.g., -R, -v, -f)
The chown command includes several useful options that enhance its functionality. These options allow for more precise control over how ownership changes are applied. Using them correctly can save time and prevent errors.
-R(Recursive): This option changes the ownership of files and subdirectories recursively within a specified directory. It’s incredibly useful for applying ownership changes to entire directory trees.-v(Verbose): The verbose option displays detailed information about each file processed. This provides confirmation that the command executed as intended.-f(Force): The force option suppresses most error messages. While sometimes useful in scripts, use it with caution as it can hide important warnings.
Additionally, the --from=CURRENT_OWNER:CURRENT_GROUP option allows you to change ownership only if the current owner and/or group match the specified values. This adds another layer of control and safety. Always consult the man chown page for a complete list of available options and their specific behaviors.
Distinguishing User vs. Group Ownership with Chown
It’s important to understand how to target either user or group ownership specifically with chown. You can change the user, the group, or both simultaneously. This flexibility is crucial for fine-tuning file permissions and access. For instance, a web server user might need ownership of its files, while a specific development team group needs access to those same files.
To change only the user, specify only the username: chown newuser file.txt. To change only the group, prepend a colon or period to the group name: chown :newgroup file.txt. If you specify both, separate them with a colon: chown newuser:newgroup file.txt. This precise control over user and group ownership is a core feature of the Chown Command in Linux (File Ownership).
Practical Examples of Chown Command in Action
Seeing the chown command in action helps solidify understanding. These practical examples demonstrate common scenarios where changing file ownership is necessary. Always remember to execute these commands with appropriate privileges, typically as the root user or using sudo.
Changing User Ownership of a File or Directory
Let’s say you have a file named report.txt currently owned by user1, and you need to transfer its ownership to user2. This is a common administrative task. You would simply execute the command sudo chown user2 report.txt. After execution, user2 will become the new owner of report.txt.
Similarly, to change the user ownership of an entire directory, for example, /var/www/html, to a user named webadmin, you would use sudo chown -R webadmin /var/www/html. The -R option ensures that all files and subdirectories within html also get their user ownership updated. This is a powerful feature of the Chown Command in Linux (File Ownership).
Modifying Group Ownership with Chown
Sometimes, you only need to change the group associated with a file, not the user owner. For instance, if data.log is currently owned by the users group and needs to belong to the loggers group, you would use sudo chown :loggers data.log. The colon before loggers explicitly tells chown to modify only the group.
This is particularly useful in collaborative environments. Multiple users can belong to the same group and share access to files owned by that group. For example, a project directory might be owned by a specific project group. This allows all team members to access and modify files as needed, provided they are part of the designated group.
Changing Both User and Group Ownership Simultaneously
Often, you will need to change both the user and group ownership of a file or directory at the same time. This is achieved by specifying both the user and group, separated by a colon. For example, if you want to make appuser the owner and appgroup the group for /opt/myapp/config.ini, the command would be sudo chown appuser:appgroup /opt/myapp/config.ini.
This combined approach is highly efficient. It ensures that both ownership attributes are updated in a single operation. For a directory and all its contents, you would again use the recursive option: sudo chown -R appuser:appgroup /opt/myapp. This guarantees consistent ownership across the entire application structure.
Advanced Chown Techniques and Scenarios
Beyond basic usage, the chown command offers advanced techniques for more complex scenarios. These methods provide greater flexibility and control, especially in automated scripts or when dealing with specific file system structures. Understanding them can significantly enhance your administrative capabilities.
Recursive Chown: Applying Ownership to Directories and Subdirectories
The recursive option (-R) is perhaps the most frequently used advanced feature of chown. It allows you to apply ownership changes to a directory and all its contents, including subdirectories and their files. This is invaluable when setting up new user home directories or configuring application installations. However, exercise extreme caution when using -R, especially in critical system paths.
For example, if you’re deploying a new web application to /var/www/mywebapp, you might need to ensure all files are owned by the web server user and group. The command sudo chown -R www-data:www-data /var/www/mywebapp would accomplish this efficiently. This ensures the web server has the necessary permissions to read and write its own files. It’s a key aspect of managing the Chown Command in Linux (File Ownership).

Using Numeric User and Group IDs with Chown
While typically you use usernames and group names with chown, it also accepts numeric User IDs (UIDs) and Group IDs (GIDs). This is particularly useful in environments where user and group names might not be consistently resolved, such as across networked file systems, or when dealing with deleted accounts. Every user and group on a Linux system has a unique numeric ID.
To find a user’s UID, you can use the id -u username command. Similarly, id -g groupname reveals the GID. Then, you can use sudo chown 1001:1002 file.txt, where 1001 is the UID and 1002 is the GID. This ensures ownership is set correctly even if the corresponding names are unavailable or ambiguous. This method provides a robust way to manage ownership.
Handling Symbolic Links and Chown Behavior
The behavior of chown with symbolic links (symlinks) is an important detail. By default, chown will change the ownership of the target file or directory that the symlink points to, not the symlink itself. This is generally the desired behavior. However, there are scenarios where you might want to change the ownership of the symbolic link file itself.
To change the ownership of the symbolic link file itself, rather than its target, you can use the -h (or --no-dereference) option. For example, sudo chown -h newuser symlink_to_file would change the owner of the symlink entry, not the actual file it references. Understanding this distinction is crucial for advanced file system management. This specific behavior impacts the overall use of the Chown Command in Linux (File Ownership).
Best Practices and Security Considerations for Chown
Using the chown command effectively goes hand-in-hand with adhering to best practices and understanding security implications. Incorrect usage can lead to significant vulnerabilities or operational issues. Always approach ownership changes with a clear understanding of their impact.
Common Chown Errors and How to Avoid Them
Several common errors can occur when using chown. One frequent mistake is specifying a non-existent user or group. This will result in an error message like “invalid user” or “invalid group.” Always verify the existence of users and groups before executing the command. You can use getent passwd username or getent group groupname to confirm.
Another error involves incorrect paths. Double-check your file and directory paths to ensure accuracy. Using the -v (verbose) option can help identify issues by showing which files were processed. Furthermore, avoid using -f (force) unless absolutely necessary, as it can mask critical error messages. Always proceed with caution, especially when dealing with system files.
Security Implications of Incorrect File Ownership
Incorrect file ownership poses severe security risks. If a sensitive file, such as a configuration file for a critical service, is owned by an unprivileged user, that user could potentially modify it. This could lead to privilege escalation, allowing them to gain root access or disrupt services. Conversely, if a user’s home directory is owned by root, they might not be able to write to their own files, causing usability issues.
Always ensure that files and directories are owned by the least privileged user necessary. For example, web server files should typically be owned by the web server user (e.g., www-data) and group. Granting root ownership unnecessarily is a common security misstep. The principle of least privilege is paramount when working with the Chown Command in Linux (File Ownership). For more details on Linux security, you can refer to Wikipedia’s Linux security page.
Integrating Chown with Chmod for Comprehensive Permissions
While chown manages who owns a file, chmod manages what permissions the owner, group, and others have. These two commands are often used in conjunction to establish a complete and secure permission scheme. chown sets the stage by defining the primary actors, and chmod then specifies their actions.
For example, you might first use chown user:group file.txt to assign ownership. Then, you would use chmod 640 file.txt to grant read/write to the owner, read-only to the group, and no access to others. This combination ensures robust access control. Always consider both ownership and permissions for a truly secure and functional Linux environment.
Frequently Asked Questions
Here are some common questions regarding the chown command and file ownership in Linux.
What is the difference between chown and chmod?
The primary difference lies in their function. chown (change owner) modifies the user and/or group owner of a file or directory. In contrast, chmod (change mode) alters the permissions (read, write, execute) that the owner, group, and others have on that file or directory. They are complementary commands for managing file access.
Can I change ownership of a file I don’t own?
No, a regular user cannot change the ownership of a file they do not own. Only the root user or a user with sudo privileges can change the ownership of any file or directory on the system. This is a fundamental security measure in Linux to prevent unauthorized tampering.
How do I find the current owner of a file or directory in Linux?
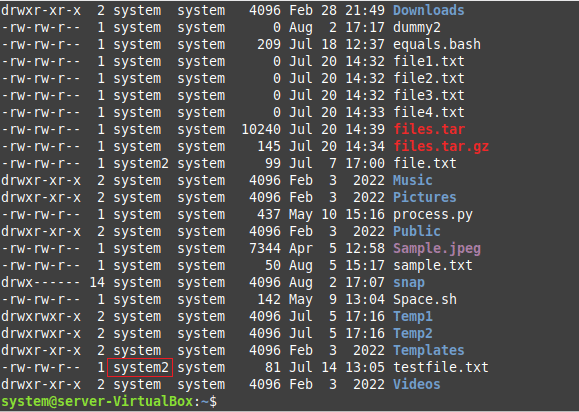
You can easily find the current owner and group of a file or directory using the ls -l command. For example, ls -l filename.txt will display detailed information, including the user owner and group owner, in the third and fourth columns of the output, respectively. This command provides a quick overview of file attributes.
Conclusion: Mastering Linux File Ownership with Chown
The Chown Command in Linux (File Ownership) is an indispensable tool for any system administrator. It provides the granular control necessary to manage user and group access to files and directories effectively. By understanding its syntax, options, and best practices, you can significantly enhance the security and stability of your Linux systems. Proper ownership ensures that only authorized entities can interact with specific resources.
Recap of Chown’s Essential Role in Linux Administration
In summary, chown is critical for security, resource management, and maintaining system integrity. It allows administrators to delegate control, prevent unauthorized access, and ensure applications run with appropriate privileges. Its recursive capabilities and support for both names and IDs make it a versatile utility. Mastering this command is a fundamental skill for anyone working with Linux.
Next Steps for Effective File Ownership Management
To further solidify your understanding, practice using chown in a safe, non-production environment. Experiment with different options and scenarios. Additionally, delve deeper into chmod and Linux permissions to gain a comprehensive grasp of file access control. Share your experiences or questions in the comments below, and continue exploring the power of Linux commands!
7 thoughts on “Your Guide To Chown Command In Linux (file Ownership) Master”